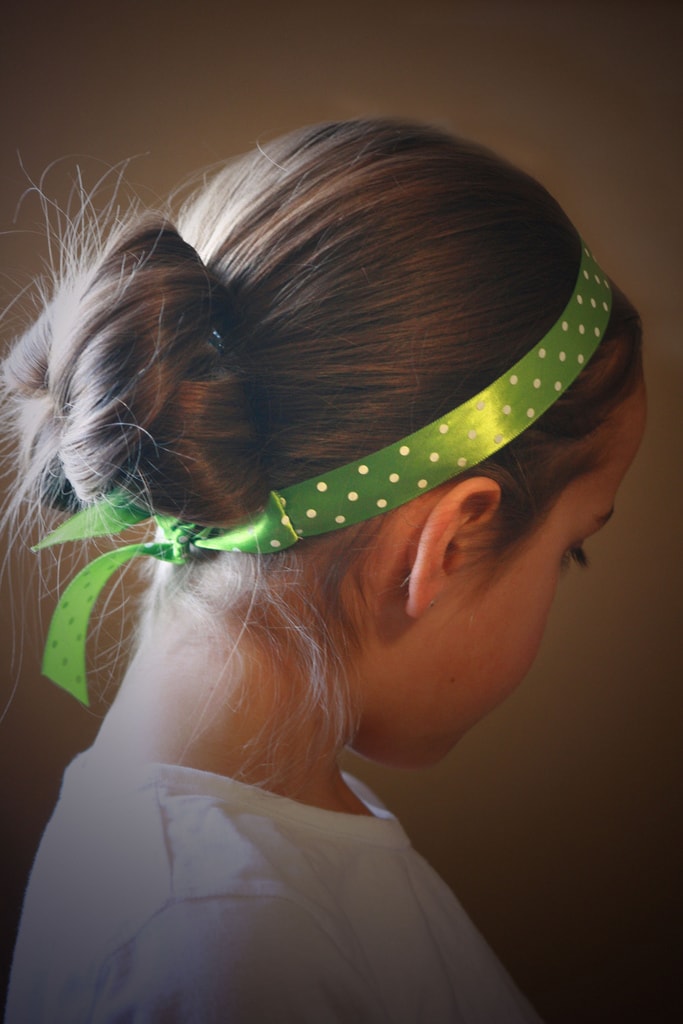
The night before Easter I was trying to decide what to do in my daughters’ hair the next day. With six girls our Sunday mornings go a lot smoother when we plan ahead of time. I wanted them to be matching but not matching, do you know what I mean? I came up with the idea of sewing these quick ribbon headbands – three green and three blue – to match their Easter outfits. They received so many compliments (the girls and the headbands) I decided to share how very easy they are to make. This design is a play off of the easy ribbon headband tuorial from Altered Cloth.
Materials:
2 elastic pony-tail holders
36 inches Ribbon (or longer)
Fray Check
Step 1: Cut at least one yard of ribbon and put fray check (or clear nail polish) on the cut ends so the ribbon doesn’t fray.
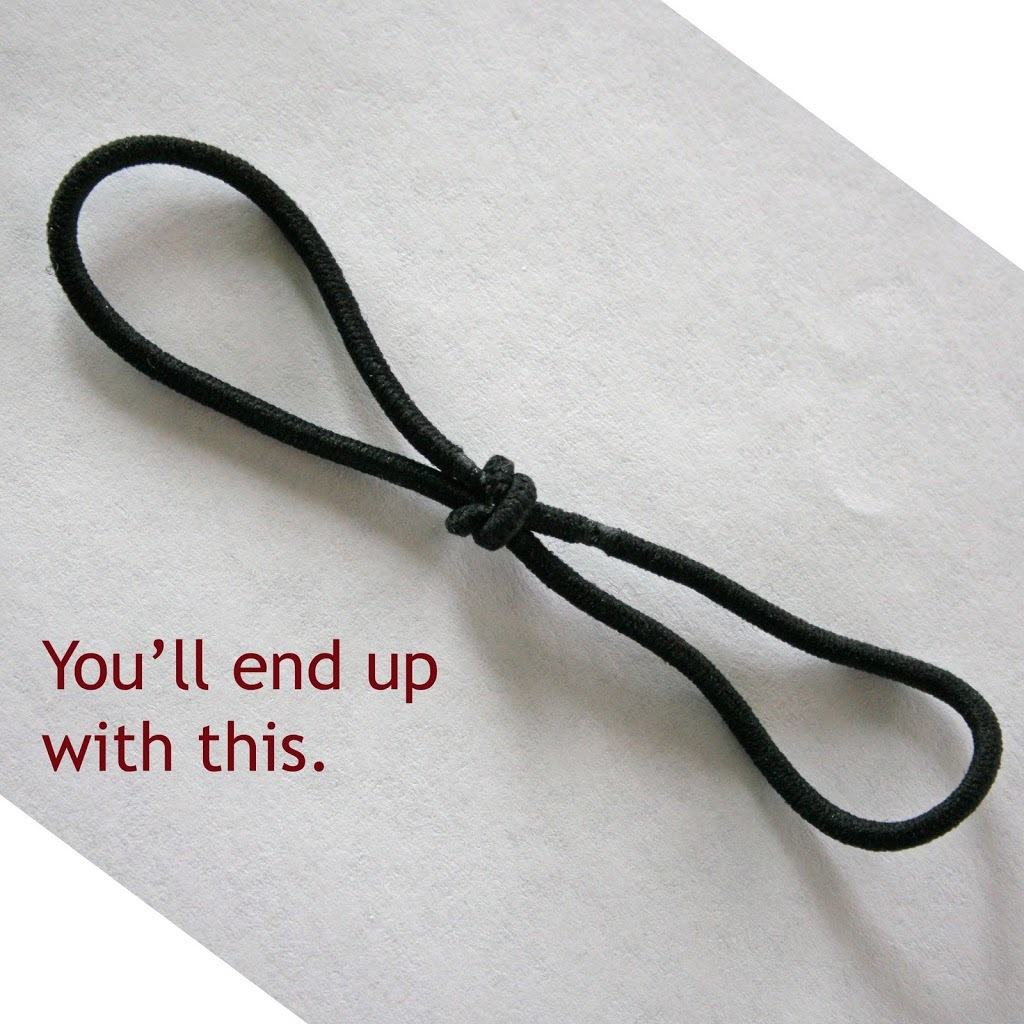
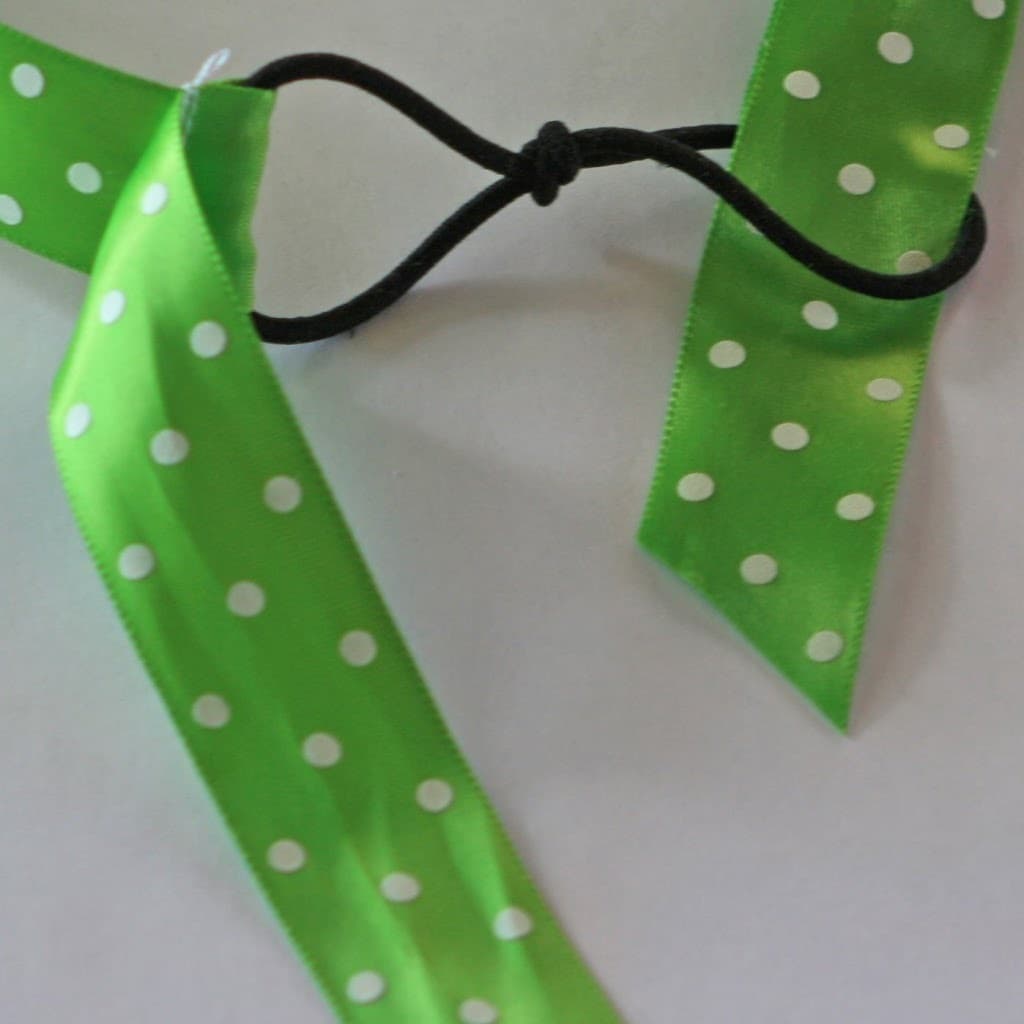
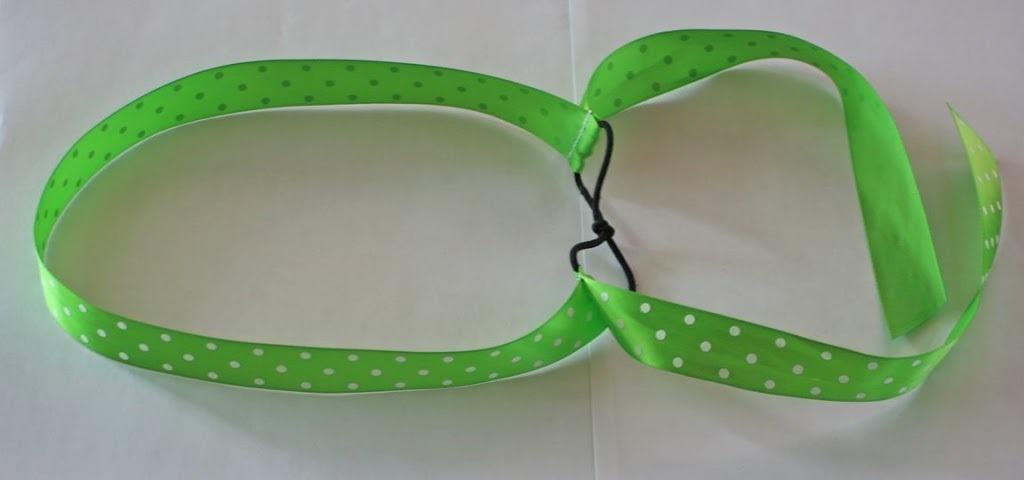
Step 2: Interlace the two pony-tail holders as shown in the pictures. Then measure the pony-tail holders from end to end by stretching lightly. You don’t want to stretch them tight or the headband will be too tight and pull back off the head. Mine had a stretch of 4 inches.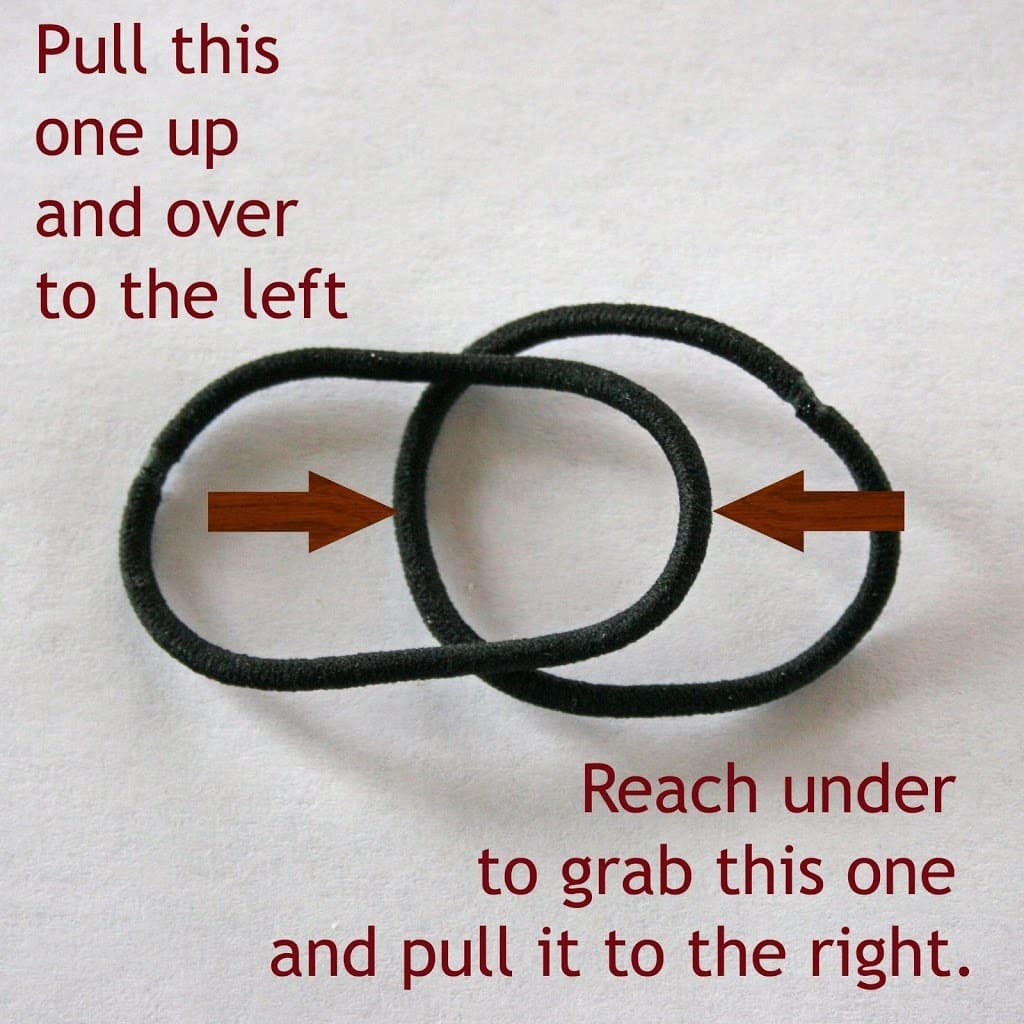
Step3: Now for some math. Yikes! Measure around your head or your daughter’s head to find the overall measurement. Subtract the pony-tail stretch measurement from that. This gives you the total amount of ribbon you need to go around your head. Half this measurement. This is your total. (For my head the half measurement was 9 inches, for my younger daughters it was 7.5 inches) Fold ribbon in half and place the fold at the end of a yard stick. Measure the total measurement from the fold and mark with a pin on each strand of ribbon.
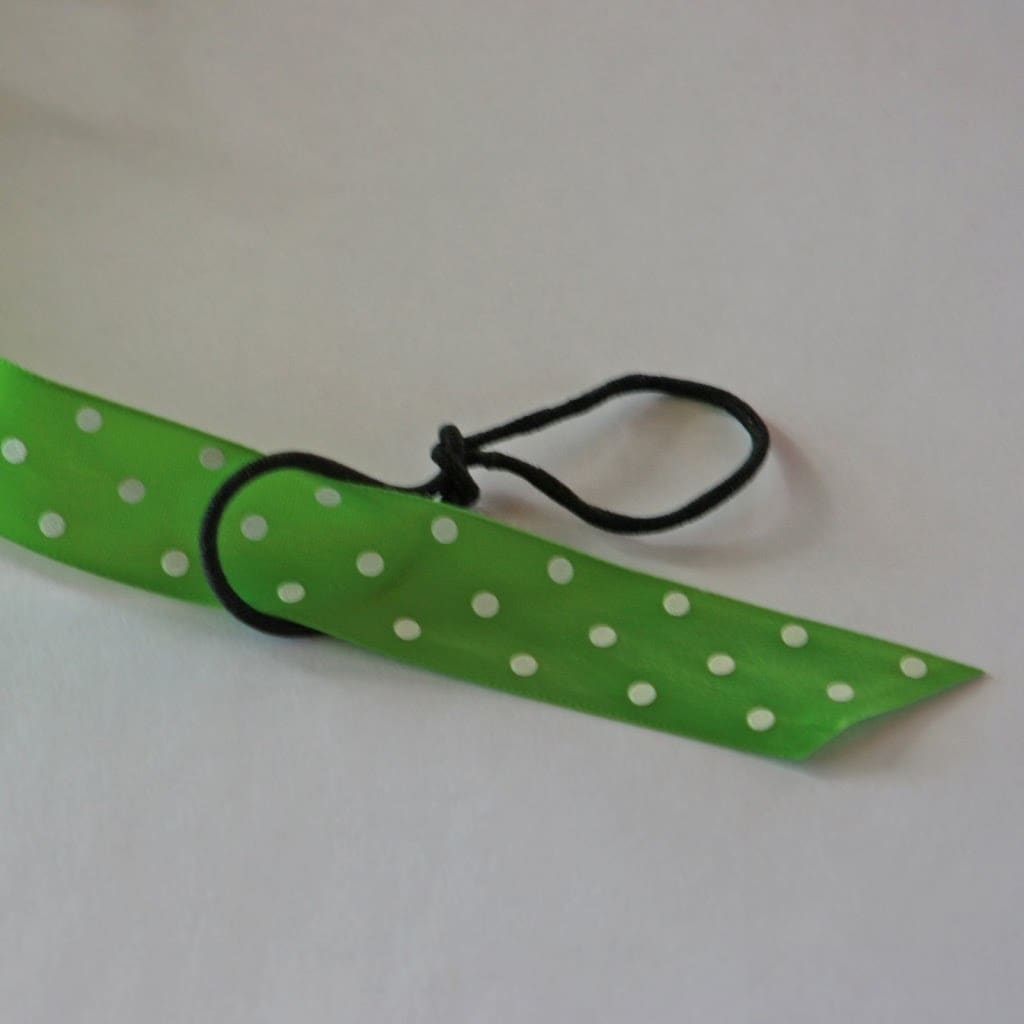
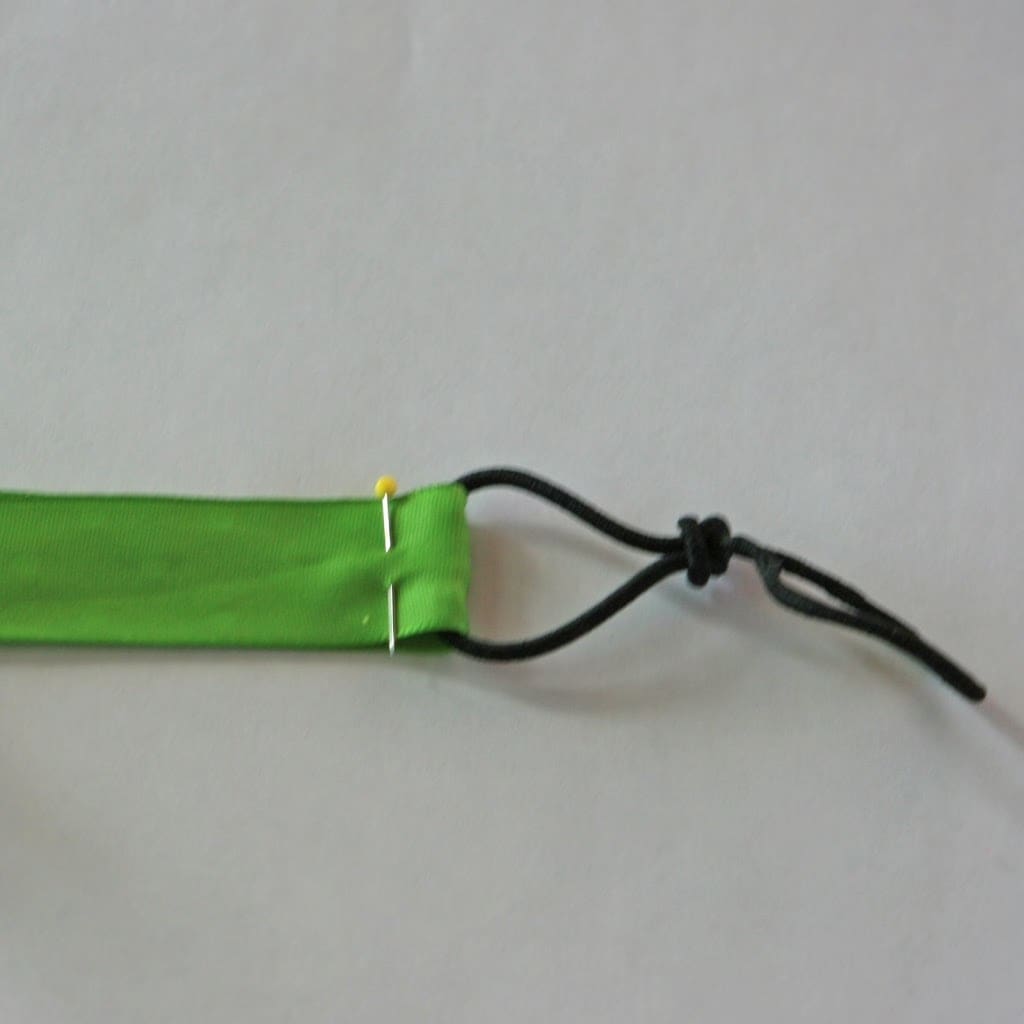
Step 4: Thread the left end of the ribbon through the pony-tail holder as shown. Pull until you get to the pin.
Step 5: Fold the ribbon so the right sides are together and sew close to the pony-tail holder.

Very cute! We’ll have to make a few (or a dozen) of these!
Who would have thought they were so easy! Cute cute! Thanks for sharing!
These are darling. I will have to show my girls. They will make them by the tens!
You are amazing! I’ll be making some of these this week. I love how easy your tutorials are to follow…THANKS!
First off, your daughter’s hair is beautiful! Those are so fun! I am such a fan of all you do! Thanks for the inspiration!
I love this idea, and I can’t wait till my little one is old enough to keep things in her hair. She loves what she calls a hair “pretty,” but she pulls it out within 5 minutes. Toddlers… 🙂
Hey, even I could make some of these! And with the way my hair is growing back I am in serious need of some pretty headbands. Thanks for the ingenious idea.
Those are really cute. What I great idea!
Thank you SO much!!!! Thy are so cute!
That is so cute, I love it.
How awesome, I may just have to try this. I love the headband look, but regular headbands drive me nuts.
What a cute idea! I’ll have to try that out for my little girls.
So cute and easy!! I have ribbon and pony tale holders laying around. I think that I shall make a few. Thanks for sharing!
Great idea! Thanks for sharing this. I need to make some for my daughter’s hair.
I love this! I can’t wait to try it!
Very clever!
Those are so cute! I love how easy they are–and I don’t have to go out and buy elastic.
Thanks for sharing! I am looking forward to trying these out!
This is great! I’ll be making this for me to wear… I mean my daughter!!
Your baby is so cute and lovable! I wonder how old is she? Anyway, you two have a great hair accessories. Did you made those stuff also?
What a create idea!!! I posted a link to your tutorial on Craft Gossip Sewing:
http://sewing.craftgossip.com/tutorial-simple-ribbon-headband/2009/08/06/
–Anne
I’ve been trying to think of ideas beyond barrettes since school is starting up again! Need some new hair accessories for my daughter and this is perfect. I just made my first one tonight – SO simple! I’ll post a picture on my blog soon and link back to your tut. THANKS FOR SHARING!
Hello!
I really like your how tos. I was wondering if I could translate some of them in French and add them to my list of how tos as explained in my french post (http://www.petitcitron.com/index.php/form_howto.html)
Of course, your website would be quoted and there would be links!
Thank you,
Perrine
Perrine,
You are more than welcome to translate the how-to’s into French as long as you link back to mine. Thank you for asking!
just came across this tutorial and I love it! Thanks so much!
Wow, who knew it could be so easy! Thanks for sharing this great tutorial.
Just had to stop by and say HI! I saw this pinned on Pinterest and thought, Hey! that’s my ribbon! lol I used that same ribbon in my daughters room project recently. I usually just tie it around a pony tail for her because when i tried the headband thing it would just slide off. I will have to try this way! Thanks for sharing! (If you want to check out the ribbon in my daughters special nook space you can go to: http://honeybeeboutiqueandblog.blogspot.com/2012/01/one-small-step-for-malloys-one-huge.html) <3 Melissa
hi, i have only just come across this page and i am already a huge fan, i cant wait to make this headband for my daughter but there is one point in the instructions that i dont fully understand. where you say about measuring around the head and the subtracting the ponytail ties and then half it, i dont quite get what you mean, if my daughters head measured say 16 and the ponytail tie measured say 4 (which would leave a total of 12) would i then half that and use just 6 inches of ribbon or do i use the 12 inches of ribbon? i will really appreciate you taking the time to answer, thank you 🙂
This measurement isn’t for cutting the ribbon but to mark where to sew the elastic to the ribbon. So in your example, the 16 inches minus the 4 inch of elastic would give you twelve inches. Half of that is 6, just like you stated. Fold your ribbon in half {use at least a 36 inch piece of ribbon} and measure six inches from the fold. Put a pin on each side so when you open the ribbon back up the pins will be 12 inches apart. You will sew the elastic where the pins are. I hope that helps.