It’s finally here. The much awaited Reversible Handbag Tutorial! I just know you’ve all been holding your breath.
These bags are much loved at our house. So much so that the girls gave some to cousins for Christmas. They also carry them to the store or church (they are perfect for scriptures!) every time we go.
Materials Needed: (picture #1)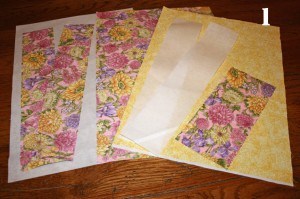
Fabric #1 – Main fabric for handbag (mine is the pink floral)
1 17 ” x 12″ piece
2 15″ x 4″ pieces for handles
Fabric #2 – Lining (mine is the yellow)
1 17 ” x 12″ piece
Fusible Pellon – adds stability
1 17 ” x 12″ piece
2 15″ x 4″ pieces for handles
All instructions assume a 1/4 inch seam allowance unless stated otherwise.
Step 1: Iron on pellon to the back of the main fabric 17 ” x 12″ piece and the back of the handles.
Step 2: Fold each handle in half length wise with wrong sides together. Iron. Fold each long end in 1/4 inch, iron, and pin together. (picture #2)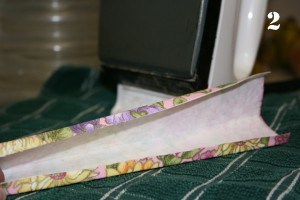
Step 3: Sew handles along pinned edge 1/8 inch from the edge. Sew along the folded edge 1/8 inch. (picture #3) 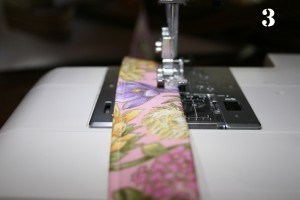
Step 4: Fold the pocket piece in half, wrong sides together, so you have a square. Sew along the three open sides leaving an opening to turn it right side out. Cut corners. (Picture #4) 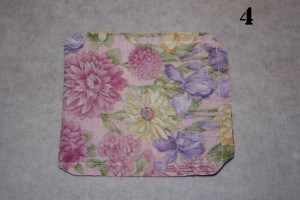
Turn right side out. Press and top stitch opening closed 1/8 inch away from edge. This becomes the top of the pocket.
Step 5: Pin pocket to lining fabric centering it 1 1/2 inches from top edge. Make sure to pin it to the right side of the fabric! (picture #5) 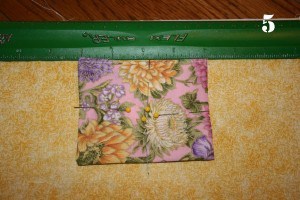
Also make sure you pin it so your topstitching is the top of the pocket. Sew around the other three edges.
Step 6: Fold the lining in half, right sides together, by bringing the 12 inch sides together. Sew each side edge. Do the same with the main fabric piece.
Step 7: This one is the trickiest step. It’s also the hardest to put into words. Crease the bottom of the bag and lining really well. Now stick a finger into a corner to puff out the material and then fold so the seam on one side is in line with the crease from the bottom on the other. (picture #6) 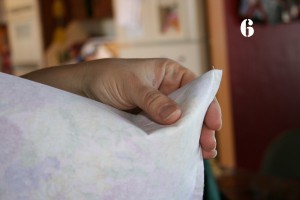
You will create a triangle with the seam going from the point straight down. On the backside the crease from the bottom will be at the point going straight down. Pin. Using a ruler find where it is exactly 4 inches across from side to side, draw a straight line with your pencil so you know where to sew. (picture #7) 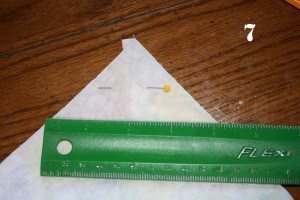
What you are doing is creating the boxed bottom for your handbag. Do this on each side of the bag and the lining. They should stand up on their “bottoms” (picture #8)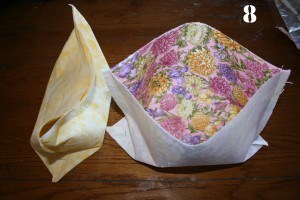
Sew along the pencil line. Clip the seams to about 1/4 inch (picture #9)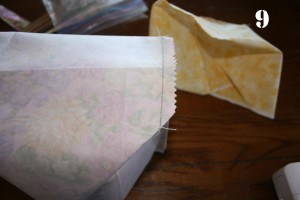
Step 8: Turn the main fabric right side out. Pin a handle on each side of the main fabric with the outside edge of the handle 3 1/2 inches from each side. (picture #10) 
Sew the handles to the main fabric.
Step 9: With the main fabric still right side out, place it inside the lining so the right sides are now together. (picture #11)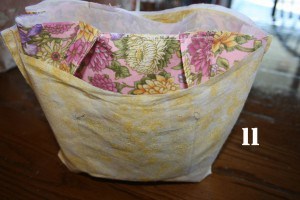
Match the side seams and pin the edges together. All you will be able to see is the wrong side of the fabric on the outside and inside of the handbag. (picture #12) 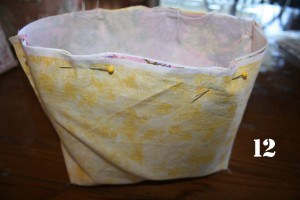
Sew around the top edge leaving a 4 inch opening to turn the bag right side out. Reach your hand into the opening and grab some material. Pull through the opening and turn the bag right sides out being careful not to rip the sewing.
Step 10: Tuck the lining into the handbag, pull the handles up, and press around the top edge. Topstitch 1/8 from edge all around the top. (picture #13) 
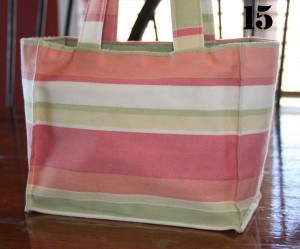
The bag is now done! You can take it a step further and do some stitching along the bottom of the bag to define it more (picture #14)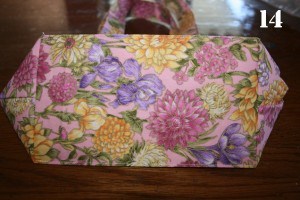 and even stitch along the sides if you prefer as seen on this bag (picture #15).
Just remember to pull the lining out before you sew along the bottom or sides so that the bag stays reversible. (picture #16)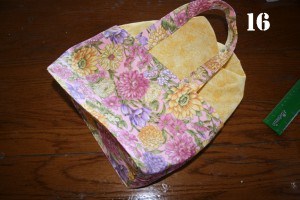
And here is the finished bag on the left and the reverse on the right (picture #17) 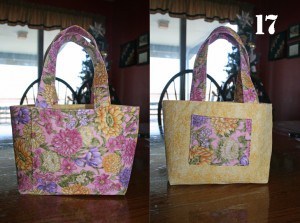
Isn’t it darling? It was given to my niece for Christmas. My third daughter Brownie asked for (and got) this one, a personal favorite of mine. 
Hopefully the instructions are as clear as mud. If you run into any problems please ask away! I just might be able to help you. And if sewing is not your thang but you just can’t live without a bag check out the ones I currently have for sell on my etsy shop Cranial Hiccups.
Edited to add:
The bag dimensions are:
Top opening – 9 x 6 inches
Bottom of bag – 7 x 4 inches
6 inches tall, 9 inches wide with 6 inch handles
I love it – so cute! Thanks so much for the tutorial. As soon as I get some cute fabric, I want to try it!
I LOVE your tutorial. I have been making these bags for a while now, but I always have trouble putting the “gussett” step into words. Thank you for figuring that out for me. Also, I love that you attach the lining and the front at the top. I have always attached straps and the top first, making it difficult to line the fabrics up right when I sew the sides. Your directions will be printed in my craft and sewing tutorials notebook. THANKS AGAIN!
Awesome! I look forward to making a bag or two from your tutorial. 😉
thanks!
Going to start some simple sewing with my daughter soon and she will love this.
looks like you’ve got some organising bags of your own! 🙂
you are very good at photographing and explaining in this tutorial. Thank you so much. I’m excited to try it out.
SO cute! Wish I could sew. You made it look easy. Happy New Year!!
Thanks for the tutorial! I’m anxious to try this out, although I’m somewhat a beginner I think I can do it. Can you tell me what the approximate finished size will be? My brain can’t think through far enough for that one! LOL!
Do you use quilting-weight fabric or the heavier-weight stuff that’s more like cotton duck? I’m guessing the former. I have a store that sells the latter in fabulous vintage prints, but I would think that would be stiff enough without the interfacing. What do you think?
Thanks for the tutorial! Maybe I will get up the courage to try one out since I got a brand new sewing machine for Christmas! 🙂 However, I’m sure I’d spend a lot of time wishing you were here to help me along. Thankfully I do have a lot of people here willing to give me a lesson or twenty! 🙂
Mommy Time,
I line regular weight fabric with the pellon. I do not line the heavy weight fabric like upholstery fabric or canvas weight.
Thanks so much for the link to the tutorial. I think I will try to make one. Your directions seem very easy to follow.
How cute and fun! My daughter and I both need new scripture pruses!
Hi, i can’t wait to start sewing my own reversible bag. This is my first time to visit your site and i just loving it. the moment i saw this site i added it to my favorites. Im from the Philippines and a member of the LDS church.
I can share this to our relief society home making class.
love,
Ruth Insigne
Thanks so much for this great tutorial. I’ve posted a pic of my finished mini-purse over on my blog. By making this one, I gained confidence to try another of my own design!
Thank you,
Michele
Great tutorial thank you!
Thanks……..I made a little bag this weekend!
Thank you so much for your tutorial. I am having a blast making them! I have even made one for a boy. I used suiting for the main fabric, dark grey cotton for the lining and shortened the handles to 8″. I ended up using pellon on both the suiting and the lining to make it stiffer. It turned out so well, now my husband wants one for his scriptures. Thank you Thank you Thank you!
After listening for weeks to my girls “Mummy can you teach us to sew….” I stumbled upon your blog for the most PERFECT first project. We used some yummy flannel fabric left over from raggy quilt making and the bags are devine.
Thanks so much!
Thanks for such an easy-to-follow tutorial! I just finished one and it’s pretty good, if I say so myself.
I was a little worried for a minute because I bought a toile fabric, but I just cut the main fabric one inch longer, cut it in half and sewed a half inch seam in the bottom. Glad my absent-minded brain thought of this before I put the bag together. My toile is all right side up now!!
Thanks again!
YAY I just followed your tutorial and LOVE my cute little bag that is the end result!!!
ok so I honestly have never followed a pattern before, the most I have sewn are appliques on onesies and a few carseat covers, but this was so easy to follow. I love love it and will be making lots more of these cute bags!
thank you!!
Heather
Hi!!
I just have discovered your blog, and I like it very much.
I’m from Spain, my name’s Mirella, and i have a blog too, its name is feltlife, I love felt crafts, and I made myself many things, specially felt brooches :), I love them all.
I like very much too the proverb you had chosen for comments, it’s from my country!! and we use it very often 😉
Well, it`s very nice meeting you and your bags, I’ll visit your blog from now on 🙂
Regards from Spain!
hi! i just wanted to say thank you so very much for putting up this tutorial! you did a GREAT job of taking photos and explaining how to sew. this is the best tutorial, by far, that i’ve seen. all my friends want a bag of their own! looks like i’m gonna be very busy. again thank you so much!!!! great bag!!!
nikki in asheboro nc
Hey Cocoa,
I have been looking all over the internet for a good tutorial on how to do this and I googled it and tada your blog came up! I thought, Geez, if I had just started the search in a place I trusted then I could have saved myself a lot of time.
I have a quick question, I have already made one for myself and am working with the beehives in my ward to have them sew their own, but I’d like to convert this to a grocery bag or some other sort of bag and was wondering how I could do the measurements with the “gusset”? to make sure I don’t end up with some funky shapes or sizes. And how much fabric I would need? Is there a magical mathematical formula or do I just need to experiment.
Thanks!
I just found your site a couple days ago and made this purse today. I added a pocket on the outside. and think it looks nice but I noticed while making it that step 4 says “wrong sides together” and when making it I put the right sides together to make the pocket. Thanks for the bag pattern. I will be posting this on my blog and actually giving it away for my 300th post. I thought your bag looked great for a give away prize. Thanks again
Man, I love this pattern!! Its so easy to make a bag! I taught my DD 17 to make one and it only took her about 4 hours. I have made one to give away and two for my younger daughters, one for me, and one more for a niece. I have 3 more planned and love it!!!
Thank you for sharing this adorable pattern. I love it! I will be trying it as soon as I get a chance. Is there a PRINT button on the page so I can print out the directions? I would love to add it in my growing list of patterns. Thanks again~ It is a beautiful work of art~
Johanna
Thanks for the great tutorial! I have recently made a sewing course and I am now always looking for inspiration.
OK.. I LOVE LOVE LOVE the tutorial and the bag I finished up today! Thank you SO MUCH! I know that this it an older tutorial, but I had two “things” I wanted to throw out there.. #1- On the pocket step.. it says to put the wrong sides together… it should be right sides, right? (That’s what I did at least) #2- On the step where you attach the pocket.. maybe you could say that you attach it along the 17in side? This chica spent some time with a seam ripper last night because I wasn’t smart enough to look down one step to see that it obviously couldn’t go along the 12in side. Love the blog, love your story, thanks for sharing! 🙂