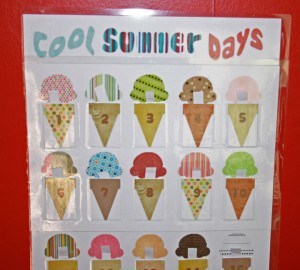
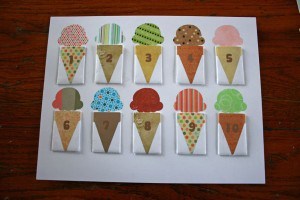
Upon posting the sewing tutorial for the Cool Summer Days Calendar I received many comments from those who don’t sew but would still like one. Here’s a paper version I came up with. It’s fairly easy – just print, cut, paste, laminate, make a few more cuts, and tape together. It only takes about one hour to do the whole thing.
Supplies Needed:
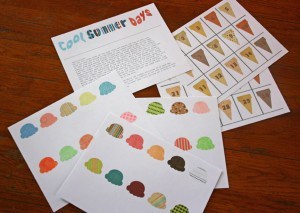
Cool Summer Days Printables (also see bottom of post)
Scissors
Glue Stick or other type of glue
Contact Paper or Laminating Machine
Craft Knife, razor or pocketknife
Paper Cutter
Clear Packing Tape
Step 1: Print off the Cool Summer Days Printables.
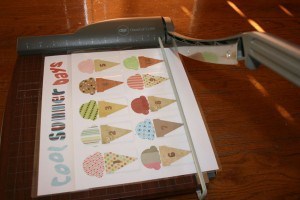
Step 2: Cut the ice cream cone sheets on the gray lines and right across the top of the cones.
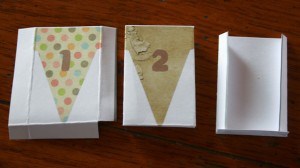
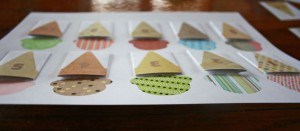
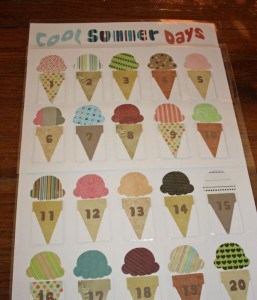
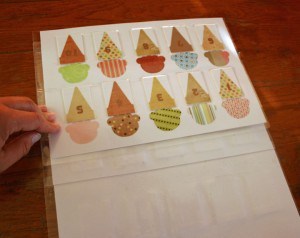
Step 3: Fold back the sides and bottoms of each cone sheet so the creases land on the edges of the cones and the bottom of the cones. Open back up and cut out the squares on the bottom corners. Fold back the sides and bottoms. This creates a pocket. (see photos above)
Step 4: Glue one cone to the bottom of each scoop making sure to only glue the tabs leaving the top open to create a pocket. Also don’t forget to keep the cones in numerical order when gluing down!
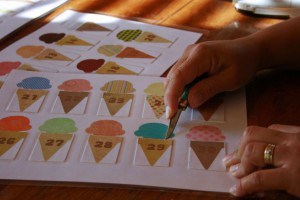
Step 5: Laminate each ice cream sheet separately. With a craft knife (or pocketknife since I couldn’t find my craft knife) carefully cut the laminating at the top of each cone so the pocket opens. Do not cut through the cardstock. It helps if you hold the knife at an angle towards the pocket opening.
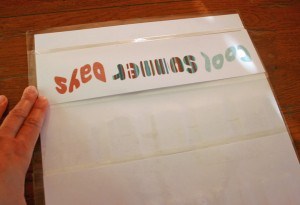
Step 6: Cut out the Cool Summer Days word strip on the gray line and laminate it too.
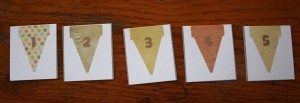
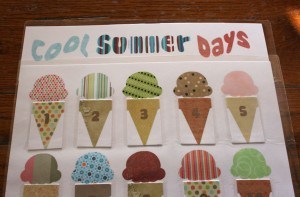
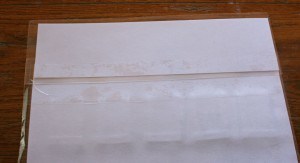
Step 7: Place the top of the first ice cream sheet on top of the Cool Summer Days word strip right below the words. Carefully turn over and tape with the clear packing tape. Only tape on the back. Do not fold the tape to the front! This will allow you to fold the whole calendar up to store for next year. (see photos above)
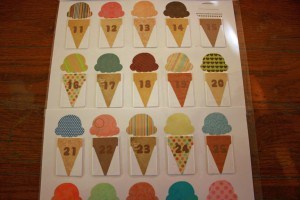
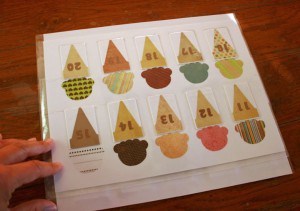
Step 8: Trim the bottom of this first ice cream sheet so the bottoms of the cones aren’t too far away from the top of the scoops on the next sheet. The second ice cream sheet will go under the first one. (see pictures above) Again carefully flip over and tape only on the back.
Step 9: Trim the top of the third ice cream sheet so the top of the scoops will be just under the ice cream cones on the second sheet. The third sheet will be placed on top of the second sheet. (Both the top and bottom edges of the second sheet will be under the other two sheets) Carefully turn over and tape on the back.
**Just a note: The instructions on the printables are wrong when I explained the taping. Follow these instructions in this tutorial.
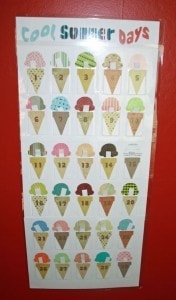
Step 10: If you’ve taped correctly the calendar will fold up as follows. Turn it over and flip the word strip down. Then flip the next page down, then the next. (see photos above) This will fit into a file folder to store away for next summer.
Step 11: Unfold the calendar and hang up! It is ready to be filled with fun summer activities for the kids.
Here is the pdf file in Goggle Docs (free for everyone) – Cool Summer Days Printable Calendar
Those that have a Scribd account can download below. I left the Scribd file up so everyone can scroll through and see what is in the pdf file.
This prints better if you download the pdf file first to your computer, then adjust the printer settings to either “Fit to Printer Margin” or “Reduce to Printer Margins.” Reducing will keep everything in scale. I recommend printing on white cardstock.
Cool Summer Days Paper Tutorial
Digital Scrapbook Papers contained in this project came from Two Peas in a Bucket and Shabby Princess.

you are seriously talented to make that downloadable file!! It seems harder than sewing!! and now you have made it so easy for us!! thanks!! Now I wish I had a colour printer
Oh my gosh, this is amazing!! All afternoon, I’ve been trying to figure out how to make my own out of paper, and here you’ve done all the work for me!
THANK YOU!!!!!
This comment has been removed by the author.
THANK YOU!! My kids and I made a list last week of 30 activities, and we just cut the paper into strips and put the strips in a bowl for lack of a fabulous calendar. Now we have an activity for tomorrow in making this calendar. They both LOVE to cut things (they’re 3 and 5 yrs old), so while I think this may take us longer than an hour to assemble, it will be a great family project. So many thanks for doing all this work to provide a project we can all do together in place of the beautiful sewn one that I would have had to do all by myself in stolen moments. I suspect I speak for many of your readers when I say that you are a very thoughtful and generous soul, and we much appreciate it.
I am having trouble printing this…I’ve tried landscape and print to fit but it keeps printing to big or so I get a large margin on the left and half the scoops/cones to the far right. Any suggestions?
What a nice thing for you to do!! Printing and cutting is do-able for me. It’s so cute.
I made this a while ago and have been doing it now for a few days and just have to thank you for making this for everyone. I found your blog through a friend and have loved your ideas. I too am Homeschooling and your ideas for that inspire me as well. Thank you so much!
WOW! What a fabulous tutorial!!! Thank you for the great printable and ideas for the summer!
Thanks so much, this is adorable!