Sewing won the home making poll from last week so the next several weeks my home making posts will cover the lessons I teach my beginning sewers (ha! s-oh-er rather than s-ew-er).
In our house my children are very spoiled. When they turn eight years old Grandma and Grandpa buy them their own sewing machine! And these are not the beginner very basic machines. Consequently the very first lesson my beginning sewers receive is to learn all about their machines – how they operate, how to care for them, and what stitches they do. The lessons I will share I learned from a very dear friend who gave my older daughters sewing lessons when we lived in Fallon. (She’s the same one who quilted their quilts!)
Since every sewing machine is different I leave it up to you to read your owner’s manual and learn how to thread yours properly, wind the bobbin, and where to oil it and clean it.
Today we will start with labeling the tension, the width, and the length buttons, as well as sewing every single stitch that your sewing machine will do (except for the button holes).
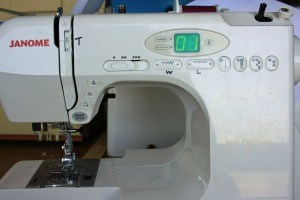
Knowing right where the width and length adjustments are as well as the tension adjustments really helps when you run into problems with your stitches. We just write right on the machine with a permanent marker labeling them T (for tension), L (for length), and W (for width). If you don’t know where they are for your machine look in your manual.
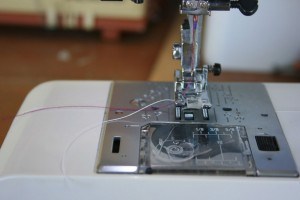
We thread the machine with two different colors – one on the spool and a different in the bobbin. This helps when we learn about tension to see which side is being pulled to tightly.
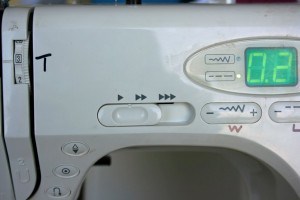
Before we begin any sewing I set the machine to the slowest setting. Luckily these Janome machines come with slow, medium, and fast (normal) settings (the arrows in the above photo). My two oldest have Singers which doesn’t have this option. So instead we put a small block off wood under the pedal so that it can’t be pushed completely to the floor. They sew on the slow setting until we both feel comfortable with them going to a higher speed.
The only other thing you need before starting is two long pieces of white or cream material about 6 inches by 15 inches. You keep them together to add stability rather than sewing through one piece of fabric.
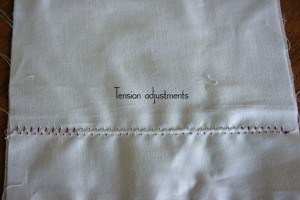
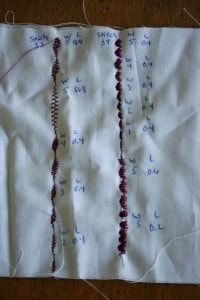
We start with adjusting tension. The child turns the knob to the loosest tension setting (the highest number) and sews for a few inches, then they turn the knob down to the recommended tensions setting (usually 3,4,or 5) and sews for another few inches, then tightens the tension lowering the knob to the lowest number and sews to the end. We sew going across the 6 inch width of the fabric. After clipping the thread I have them turn the material over and we can see how the tension pulls the different threads certain ways. In the photo above starting from the left: tension to loose (top thread being pulled to the underside), middle tension just right, right-tension too tight (bottom thread being pulled to the top).
After we adjust the tension back to its proper setting we get to sew using every single stitch on the machine! My kids LOVE this part.
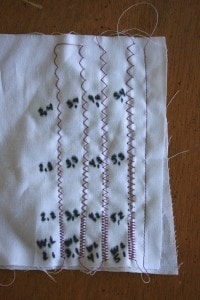
We start with a basic zigzag stitch. The child sews one whole line with the width staying the same and they adjust the length every couple of inches. The next line we stitch the same exact stitch but turn the width down one and then again vary the length of the stitches every couple of inches. We label the stitches as we finish each line. I have them look to see if they can tell when they changed the length setting and label it right next to it. See the above photo as an example for what we do.
After the zigzag stitch, follow the same procedure with every stitch available on the machine. These strips of fabric are kept as a reference for future use. When we want to finish seams we can look at the zigzag stitches and see what width and length we want to use. If there are any decorative stitches we want to add to a piece of material we can look on the strip to see the right settings for the look we are going for.
 © 2007-2011 Chocolate on my Cranium, LLC all rights reserved
Fun post. And it reminded me to go get my old faithful Bernina out of the sewing machine hospital. First fix ever.
Great post! I always had my grandma fix the sewing machine tension when it didn’t work right, so I never really learned. Thanks for taking the time to share this. Do you know if tension would cause my needles to bend?
Unrelated comment to the post – just wanted to say I’m a Pediatrician in New York City. Just attended a Stake fireside on our Humanitarian Services / LDS Philanthropies…and the presenter mentioned you and your blog increasing internet traffic to the Church. Good job! I’ll have to visit more often and try out the great ideas you post!
so getting my machine for my 21st birthday (after I was married!) from my mother was a little late then? lol. I’ve never thought about buying the girls their own!! good idea. Maybe a 12th birthday present?
Even though I’ve sewn many a thing, I dont think I knew about some of the stuff in this post 🙂 good refresher..
Boys can benefit from sewing too. Domesticity is a skill for males and females. I’m 36 and my (male) best friend is 34, and we are both trying out sewing for the first time, since we never learned when we were younger. He wants the skill and sees it as a survival skill– the same for knitting. I taught him to knit.
Thank you sooo much … I’m so intimidated by sewing, but I’m trying to figure it out right now (another thing on my 40 by 40 list). I’m going to print this out and go through it!
Love this post!
oh thank you for this post-so great-I’ve been wanting to learn how to sew, but not sure where to begin. Lovely
This was a great post. I’ve been sewing for several years now, but I never thought to make a reference of all the stitches my machine can make. Sheer Brilliance. Having that would have helped me so many times in the past.
Hello, what a great post! I am a believer in kids learning how to do the basics themselves right from the start. (From the old, but true give-a-man-a-fish vs teach-a-man-to-fish analogy) Good for you!
I was curious to see you using zig-zag to set tension. That stitch always pulls the top thread to the bottom even when it’s correctly balanced. Try straight stitching to set the tension, and then have fun with the decorative stitches. I think you’ll find that you’ll get a better idea of what balanced tension looks like.
I loved your idea of putting a block of wood under the foot pedal to reduce speed. I’ve used orange crates to raise the foot pedal to a comfortable sewing height, but I never thought of that for speed control. Cool!