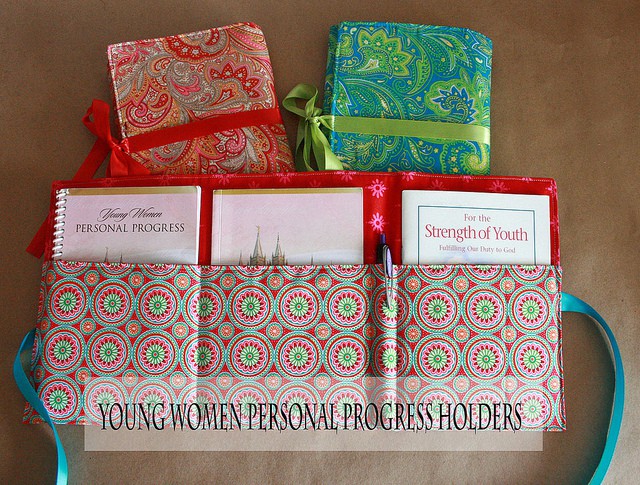
My cute little niece has been making these as gifts for all the girl cousins who are in the Young Women organization at church. They hold a Personal Progress booklet and journal, a pen or pencil, and a For the Strength of Youth pamphlet. I haven’t seen them before and thought they were a novel idea! Here is a tutorial for those who would like to make their own.
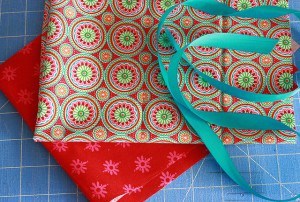
Materials needed: UPDATED as per requests in the comments to accommodate the newer For the Strength of Youth pamphlet
2 coordinating pieces of fabric cut 14×18.5 inches
1 piece of iron on interfacing cut 14×18.5 inches
1 yard (36 inches) of 1/2 inch ribbon
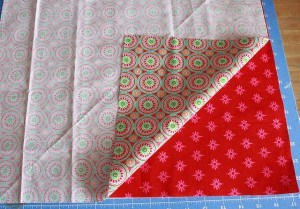
Step 1: Iron the interfacing to the wrong side of one piece of fabric. With right sides together, sew the fabric pieces, using a 1/2 inch seam allowance.
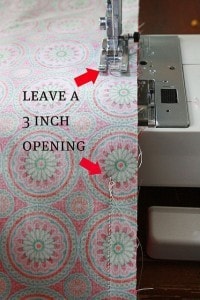
Make sure to leave a 3 inch opening along one long edge (18.5 inch side) for turning the fabric right sides out.
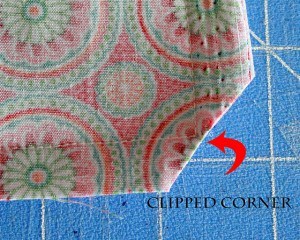
Step 2: Clip corners so you get a nice crisp corner when you turn it right side out.
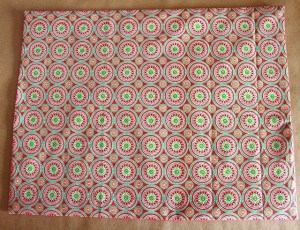
Step 3: Turn right side out. Make sure to push the corners and edges all the way out. This is where interfacing comes in handy! It makes the edges nice and crisp.
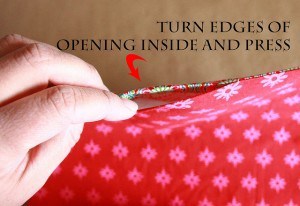
Iron all the edges turning fabric at the opening inside.
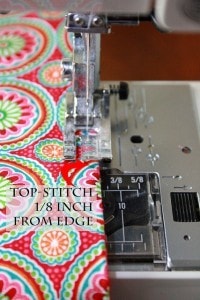
Step 4:Top stitch 1/8 inch from the edge along the side with the opening. This will close the opening.
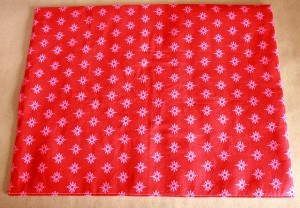
Step 5: Place your fabric with the inside fabric facing up and the top-stitched edge at the bottom.
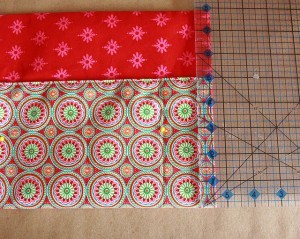
Fold up the top-stitched edge 5 inches and pin. The top-stitched edge will now become the top of the pockets.
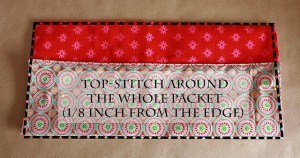
Sew 1/8 inch from the edge all around the packet.
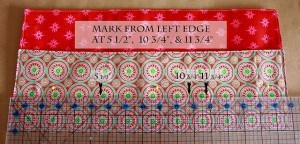
Step 6: Starting from the left side of the packet measure at 5 1/2 inches, 10 3/4 inches, and 11 3/4 inches. Draw lines at these marks going from the top of the pocket to the bottom.
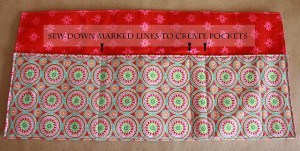
Sew along these lines making sure to back stitch at the top and bottom.
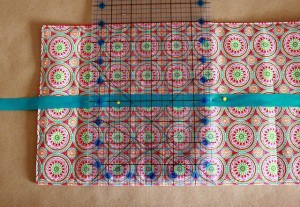
Step 7: Turn the holder over. Place the ribbon so it in is the middle about 4 inches up from the bottom. Measure 12 inches of ribbon and place that at the left edge. Pin.
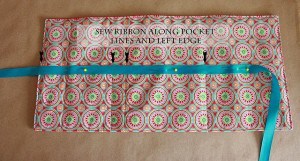
Step 8: Sew the ribbon at the left edge and at each pocket stitching. See photo above for reference.
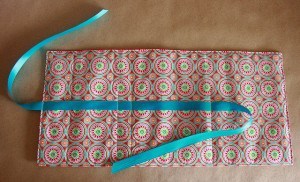
This is what it will look like. You should have about 12 inches of loose ribbon on each end. Place clear nail polish or fray check on the ends of the ribbon to keep them from fraying.You are done!
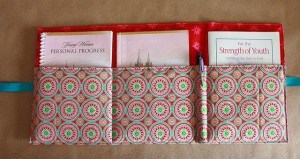
Step 9: Place Personal Progress Book and journal and For the Strength of Youth pamphlet in each pocket. Don’t forget a pen or pencil! The pocket on the right is a bit larger to accommodate the FSOY pamphlet.
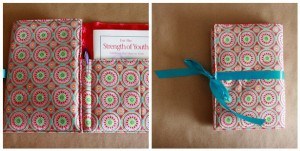
Step 10: To fold up, fold left side over, then right side and tie the ribbon with a bow.
Download a pdf file with all the instructions here: Young Women Personal Progress Book Holder  © 2007-2011 Chocolate on my Cranium, LLC all rights reserved
That’s cute! A great way for a young girl to pick up some sewing skills.
Very creative and cute. I hope she used this idea for a value experience.
That is TOO cute. Molly is sure she’s in love and needs one right away. 🙂
Very cute! Now I just need to convince my mom to make it for my soon to be 12 year-old daughter! 😉
This is darling! Thanks so much for sharing!
Wonderful! Has anyone figured out a Value Experience to go with this?
My other niece and my daughter are sewing some for all those who will be coming in to the Young Women Program. By the time the fabric is cut and then sewn it will be the 10 hours needed for either Good Works or Knowledge (sewing skills) Value Project.
We’re making them this week and next at mutual and we are passing off Knowledge #2. So excited! I just made mine as an example for the girls!
Love this idea! thank you for the pattern. I will be working on this one with my daughter who will enter the YW program in March.
Love these! I want one for myself, too! It is a great project idea.
Since being called as the PP advisor to my ward’s YW – I have been looking for something to give these girls and I think I just found it!!! AWESOME! thx!
I am a new convert and just recieved my first calling as the PP advisor and when I look at lds.org it says that this is a non standard calling and to obtain information about girls’ progress you have to be placed under one of the other branches. How do you manage the girls’ progress?
Katie, we have a very small YW (7 active girls). We ordered these http://store.lds.org/webapp/wcs/stores/servlet/Product3_715839595_10557_3074457345616706216_-1__195588 and had a mutual activity where the girls brought their PP books and we filled out the sheets with all of their information. We keep the sheets as leaders, so we can keep track of where the girls are at with PP. It also helps having the sheets, so we can see what experiences or projects we can do as activities or in lessons to help the girls get it done. I hope that helps.
I totally pinned this on pinterest! It’s crazy since I’m not in YW and my only daughter is 14 and already has something similar, but I love this one!! I hope my friends who are in our wards YW see this and make them. 🙂
Our YW made these with placemats.
Where can I find that fabric?
The red fabric is from the Gypsy Bandana line. I bought it here: Marie Madeline Studio
The outside fabric is called Sweet Tooth Medallions Rock Candy from Anthology fabric. I also bought it at the link above but it appears they are out.
Absolutely the cutest thing I’ve ever seen for keeping these booklets together. Thanks for sharing!
My daughter sent me this link. I am gong to share it with my Beehives but it is so cute I am going to make it for the few granddaughters who will be turning 12…sometime in the future. Thank you for such a fun, useful, easily doable project.
this is a really great idea. thanks for sharing and for the tutorial too… that always helps me tons! 😉
Thanks for the great idea! I modified it to be a little smaller so I can keep my temple cards in it.
I think there is a typo on step one. It should say “right sides together” instead of “wrong sides together” right?
Thank you, Mary! I have now fixed it in the post and in the pdf file.
It seems like you should sew on the ribbon before you turn up the bottom and sew the pockets. Otherwise won’t you sew the pockets closed when you add the ribbon?
When we add the ribbon we are just tacking it down over the stitching we made for the pockets. This reinforces the pockets at the top again.
If you want all edges of the ribbon sewn down then you would definitely sew the ribbon on before turning up the pocket.
I’m such a beginner at this so this might seem like a lame question, but how many of these can you get out of a yard of fabric. Just so I know how much to buy.
I just made some tonight, and a regular bolt of fabric is 45 inches across, so you can get (6) 14×18 sides out of one yard. I got 1/2 yard pieces of different colors, and 1/2 yard makes (3) sides. The tutorial is AWESOME and they turned out great!
A regular bolt of fabric is 45 inches across, so you can get (6) 18×14 sides out of a yard of fabric. I got half-yard pieces (which makes (3) 18×14 sides) so I could mix and match patterns. The tutorial is awesome! They turned out super cute!
I love it so much!!! Even I can’t wait, so I have mine right now to show it next sunday to the girls
Thanks for sharing. That is very cute!
You can also burn the edges of the ribbon to prevent fraying. 🙂 What a great project! Thank you for sharing it here.
Thanks so much for this project! I made one and it turned out great!!
I feel that I should thank you. I have made about 15 of these and it has been so fun. I am not a seamstress and they haven’t all turned out perfect, but I am so proud after each one. Thank you for making the directions so easy to follow, especially for someone that doesn’t know “sewing terms”.
Which interfacing did you use? I guess I mean ‘how stiff’? Love this idea!!!
It depends on if your want them really stiff or not. We just use lightweight interfacing.
I made one of these as a trial to see if I want to take on the challenge of making them for New Beginnings next year. The new For Strength of Youth is a little bigger than the old one so it doesn’t quite fit. I’m going to make another one and just ad a little to the right side (so maybe 18 1/4 or maybe 18 1/2).
Thank you! I have adjusted the tutorial to reflect the larger width that will accommodate the new FSOY pamphlet.
Thanks for the great tut!
That is just adorable!!
I just made 3 tonight and 3 more tomorrow. I’m giving these to my beehives and one to myself! I’m not a sew-er at all, so it took a little while, but they are so cute!
We are making these tonight with our YW in preparation for New beginnings. I love these. Thanks for the great tutorial
We made these for our YW activity tonight and it was a hit! The girls made them entirely by themselves and they did a fantastic job. They were so proud of their achievement. Thanks for the great idea!
I’m serving in YW now and love my little holder. My son asked if I could make one his cub scout book and faith in God book. Any idea if there is a pattern for one out there?
This is amazing! Thank you so much for putting this up. We are doing it for a YW activity tonight. : )
My daughter just made these for Christmas for herself and four friends. The last pocket was really tight for the Strength of Youth booklet. I’d make them just a bit wider next time, but they turned out SO cute! Thanks for the great tutorial! 🙂
I’ve now updated the tutorial with a wider fabric so it will fit the new FSOY pamphlet. Glad things turned out so well!
I made this this afternoon and had a blast. Thanks for the great instructions. I am so excited because my daughter is going to love it. Thanks again.
I’m glad you were able to make one!
Would the True To The Faith book fit in one of the pouches? It is the same length and width but just thicker. Also, if it fits in a pouch by itself, will it still fit with all the other books in the other pouches too?
Question…. why do you only iron interfacing to 1 piece of the fabric and not both?
Just personal preference. If you want a stiffer holder you can either add interfacing to both pieces of fabric or use interfacing that is much stiffer.
Gracias por compartir.
Thank you so much!!! I love it so much. I made this for one of my value projects. It came out almost perfect and it is beautiful, almost as if i bought it in a store! Thank you!! <3
Oh and i tried to fit the True to the Faith book (since i love it so much) inside. I placed it on top of the middle pocket (not inside) and it closes. thank you 🙂
I would really like the True to the Faith book to fit inside one of the pockets. Anyone who has one, are all the pockets too small for this book? Has anyone tried adding a bit more fabric to make a slightly bigger pocket to fit this book too?
My daughters say the True to the Faith book fits in all the pockets. They put theirs in a pocket with the For the Strength of Youth booklet. The other pockets hold the Personal Progress book and the journal.
Great, thanks! I am going to make them with my MiaMaids this month. They are super excited to have one–I am too for that matter. Thanks for the great tutorial!
I made one, and it turned out great–thanks to your great directions. I did have to change a few things for mine though, because I was using a bit different sizes of fabric and wanted it to open the opposite way. We are making these for mutual this coming week with our moms. Because of some of the changes I made, I can’t use your complete pdf for our mutual night. Are you ok with me using some of your same wording/directions as long as I give credit to your site? I plan on making my own tutorial with my own pictures with a combination of my own instructions and yours–if that is alright with you.
Sure, Amy, go ahead! I love when people can improve on each other’s ideas. Thanks for asking, too. Please send me a link when you have your tutorial up and I will link to it here on the post letting people there is another way of making one if they’d prefer. Send it to cranialhiccups@gmail.com
Have fun with your moms in young women! Sounds like a great activity.
I clicked the print button for the instructions and it says it is 40 pages. Is there a way to get it to just print the instructions and not all of the side comments & advertisements. Thanks
Did you try the file on dropbox linked to at the top of the post?
https://www.dropbox.com/s/c3qd6qs7d2bkdn8/Young%20Women%20Personal%20Progress%20Book%20Holders.pdf?dl=0
This is only 9 pages and includes all the pictures in the post. If you still have trouble let me know and I will see if I can email the file to you.
Our YW made these today at our activity in NZ. They were so proud of their creations and I was so proud of them.
This is a wonderful tutorial. I just made 3 of these today with my daughters and their friend. I even made one for myself. 🙂 The girls made them for their Faith in God books. My almost 8yo is so excited to be baptized and join the Activity Days group. She couldn’t wait until December to make this special packet for her book. She says you are very talented, and I agree.
Thank you for sharing.
I’m so glad you were able to make them with your girls! Great idea to use them with Faith in God books too.
I LOVE this pattern, thank you! I made 2 for my teenage daughters and one for my 11yo who uses it for her Faith in God and can continue to use it when she enters YW’s this summer.
This may be a silly question, but should I wash the fabric first? I bought fat Quarter singles to try this on, and they say not to pre wash, but to wait and wash the finished product. I know that they are thinking of a quilt and not a project like this. I’m a beginner sewer here… ?
We don’t pre-wash our fabric. There are no silly questions! Just good ones. 😉
Love this idea….I needed to have something quick so I went to the clearance section in the home department at Target..Walmart. Picked up so cloth place mats. ($1.50- $2.50) Using your finished project I folded the mat to match. It worked beautifully.
Awesome! Even less sewing!